


Spring Cleaning Part Two: The Kitchen
In last week’s blog post we explored some great ideas for putting a sparkle in your bathroom. So now that you have thoroughly cleaned your bathroom (you did, didn’t you?), we are moving on to our other favorite area of the home. This week we are focusing on the Heart of the Home: The Kitchen.
1. DECLUTTER. First things, first! Put away all clean dishes and items usually stored in cabinets or the pantry. Remove all extra items from counters (Example: mail, keys). Do you have available cabinet space? Make the most of your counters by removing unnecessary items such as blenders, coffee grinders, freestanding can openers, etc. We suggest you keep only daily-use items on your counters. Everything else can be neatly stored for future use.
2. PRE-CLEAN. This is a simple step that will help you focus on the larger tasks at hand. Place clean dishes in the cabinets. Put dirty dishes in the dishwasher and start it. Begin other tasks while the dishes run. Place them in the cabinet as soon as they are done. Wipe down the countertops. Steps 1 & 2 will already have you feeling like you’ve made a dent on your kitchen cleaning and keep you motivated!
3. PANTRY. First, check dates on all food items. Toss anything that has expired. Next, begin organizing. Group similar items. This type of organization helps expedite preparation and cooking. As you are placing items in their new “homes” wipe down the shelving… Place breads, rice and pasta in one area. Canned vegetables in another. Oils, vinegars and sauces make a good group. Baking items like flour, sugar, baking powder and soda also are a natural grouping. Place breakfast items together: oatmeal, granola bars & cereals. Fresh fruits and vegetables that do not require refrigeration can be placed in a decorative basket or box and placed in the pantry. Lastly, think: “oldest in the front, newest in the back”. This will assist you in making certain that you utilize food items before they go bad.
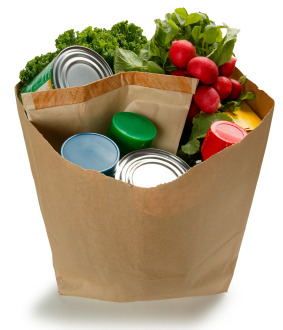
[Good Samaritan Tip: if you have items that are not yet expired but don’t think you will use them in time, put them together in a bag and donate to a local food pantry. Find a local food bank by clicking on the picture above.]
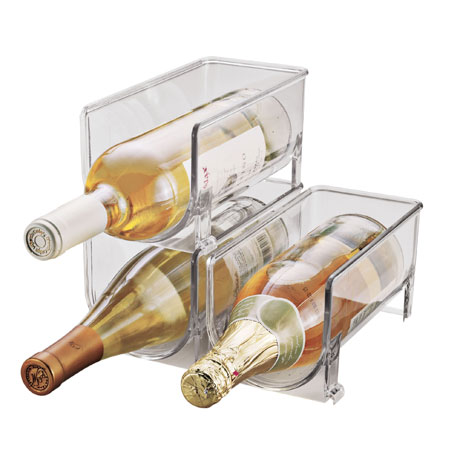
4. THE REFRIGERATOR. Begin by removing all items from the fridge, and tossing anything with an expired date. Removing shelves and trays. Wash each of these and hand dry them. Clean the shelves on the door with anti-bacterial products. As soon as you have cleaned all the surfaces, replace the food. Use similar groupings for the refrigerator, as we suggested for the pantry. Place a plastic wine rack on the bottom shelf to add more space not just for wine, but for sodas, sauces, etc.
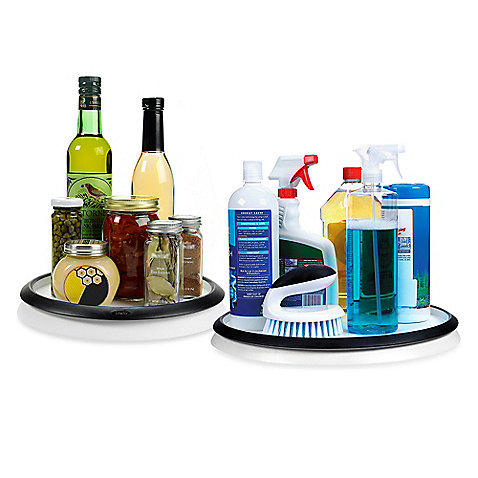
[Pro Tip: place a “lazy susan” style turntable in the fridge for better access to items. This also works in the pantry or under cabinets for cleaning products.]
5. CABINETS. Over time our cabinets can become disheveled and disorganized. Items become less neatly arranged, which leads to a loss of available cabinet space. And there is an easy fix! Reevaluate your cabinet arrangement. Stack the plastic cups for more surface area. Put small plates on top of large plates. Place items used less often in the back areas of deeper cabinets. Example: do you only use your crock pot twice a year? Put it in the back and move more-used items, like the Tupperware, to the front. Donate unused items or give them to friends, grown children or neighbors in need.
[Pro Tip: place small items like spices and oils in baking pans or shallow baskets to give your cabinets a uniform look.]
6. ORGANIZE. You’ve neatly arranged your cabinets, pantry and refrigerator. Now you can take this a step further with a couple tips and tricks to make your life easier.
– Reorganize cutlery and utensils to access them more easily. Donate unused items.
– Use a decorative cake stand to combine frequently used items, like olive oil and salt & pepper OR soaps and sponges, on your counters. The height of the cake stand also frees up counter space.

– Mount a paper towel holder under the cabinets to create more space.
– Do you use a dish rack? Place it on top of a new baking sheet. This allows you to move it wherever you would like, and not just next to the sink.
– Purchase storage labels. Utilize these to help you remember what date something was packaged or frozen and when to use or get rid of items.
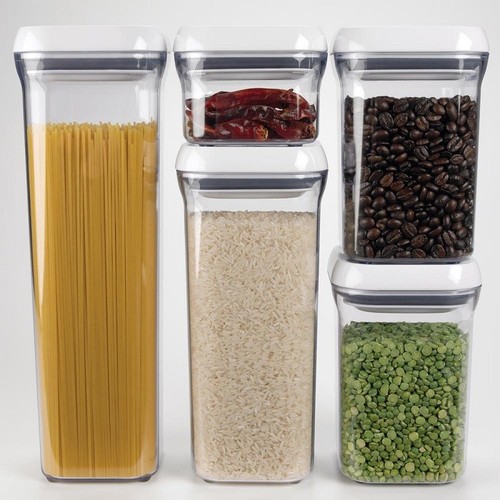
– Place perishable items such as cereals, crackers, pasta, etc. in stackable and reusable canisters to make better use of pantry space.
– Install dividers in cabinets, so that you can place pans, bake wear & cutting boards upright for ease of access.
7. DEEP CLEAN. Now that you have made the most of your space, removed unnecessary items, and decluttered your kitchen – you are ready for the final touches!
OVEN. Depending on your preference: use either an oven cleaning agent or turn the oven to “Clean” mode. Follow the directions for either process listed in your oven manual or the back of the cleaning product.
MICROWAVE. Place a bowl of water and lemon juice in your microwave until it boils (approximately 2 minutes). Leave the door shut for an additional 5 minutes. Remove the bowl and wipe down the inside. The moisture from the boiling water loosens baked on foods and the lemon juice freshens the scent!
DUST. Using a step ladder, carefully reach on top of the refrigerator, cabinets or other items to remove dust.
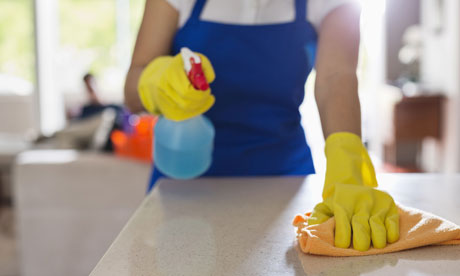
COUNTERS. Chances are, organizing your cabinets, pantry and refrigerator have left you with some new dust, dirt and crumbs. Now that you have nearly completed your Spring Cleaning for the Kitchen; wipe your counters once again. Wipe off appliances and other items left on the counters.
FLOORS. The last step! Sweep, or vacuum, and then mop your floors. Going from top to bottom (from the tops of the cabinets to the floor) assures that you get the kitchen in its cleanest condition without having to double your efforts.
You’re done! Now bask in the joy of a beautiful, clean and sparkling kitchen. Even if it only lasts for one day 😉 Happy Spring Cleaning!
Check back next week for our post on Spring Cleaning: Kitchen Essentials where we will go more in-depth into items like stainless steel, kitchens sinks, faucets, copper, non-stick surfaces & cast iron.